Unless you’ve been living under a rock (and I mean that in the nicest way possible), you’ll have noticed that Instagram is where it’s at. Facebook and Twitter still have their places for sure, but Instagram is becoming an increasingly bigger player in terms of where people are spending their social media time. Maybe it’s because it’s simpler, or because you don’t have to pay to have your posts seen (yet), or because you really DO see posts from everyone you follow. Whatever the reason, Insta is my favorite social media app!

Because we’re photographers, there’s a natural expectation that your Instas will be, well, better than the average bear’s. A natural assumption, right? Cell phone cameras have come a LONG way since their first iterations, but it’s still vastly different than shooting with your typical camera, meaning there can be a learning curve when it comes to iPhonetography + navigating the nuances of Instagram itself. I thought it’d be fun to share some know-how on taking better images with your phone + prepping them for Instagram! So here we go:
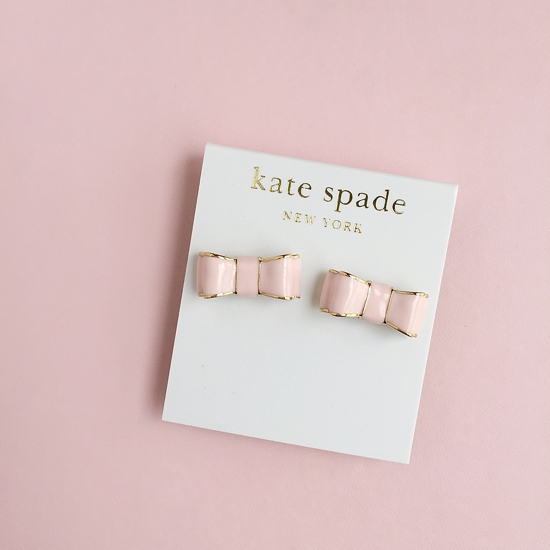
1) Remove clutter from the background. 99% of my taken-on-my-phone Instagrams are by NO means photojournalistic- pretty much every Insta is carefully staged for good light, a clean background, and a cohesive color scheme. And the first thing I do when I’m getting ready to snap an iPhone photo? Clean up my background.
Also, I want my images to feel light, feminine, and clean, so most of my still life Instas are shot either on my white desk, our white TV stand, or the natural wood, butcher’s block-topped kitchen island in our (you guess it) kitchen. It’s a neutral background that’s not going to distract from whatever I’m photographing, and with enough consistency, it becomes recognizable as an Abby Grace image without having to look at who posted it. And recognizability is huge!

2) Then, find good light! I *only* shoot iPhone photos for Instagram using natural light. True story: if I have something I really want to post on IG but it’s after sunset? I’ll wait til the next day to take the photo, because natural light is just that important to me. It’s helpful in curating a more consistent feed when someone looks at your account as a whole, which may seem like a silly thing to care about, but does actually make a difference in accruing new followers. Pretty feed overall = a higher likelihood that someone will click “follow.”
3) For the love of Hogwarts, wipe off your camera lens. I can’t tell you how many times I’ve taken a photo and can’t figure out why it’s so cloudy, only to realize there are 47 fingerprints on the tiny little lens. Give it a quick clean off with your t-shirt, THEN take your photo! I clean mine off every time, just to be safe!
4) If your shadows are too deep on your image, use some sort of a white reflector– I’ve used anything from a blank sheet of printer paper to foam core board. It helps make the contrast a bit less severe!

5) Can’t get your focus right? TAP your screen where you want the image to focus! For example, you’re taking a photo of your dog, but the phone is focusing on the chair behind said pup: touch your screen where the dog is positioned, and the camera will readjust to focus on your subject.
6) Use an editing app. My favorite is VSCO. Typically, my first step after bringing my images into the app is to brighten exposure, then I sharpen my image, then I may tweak the contrast. If it’s too blue, I’ll warm it up a little, and if it’s too green, I’ll change the tint to slightly more pink. And if it still needs a little something extra, I’ll add just a touch of the T1/Moody filter, scaling it down to a 2 or 3. Then I save to camera (if I want to preserve the non-square dimensions) or upload directly to IG.
A before and after image- edited using the aforementioned steps in VSCO, and it only took about 30 seconds.

**To clarify, I only use VSCO on iPhone images- never on my professional photographs.
7) Use an app like Squaready for non-square photos! Sometimes, especially with my professional images, I don’t want to crop to a square. So Squaready allows me to upload a horitzontal or vertical image

When you’re thinking about your IG feed as a whole, like I said above- we’re going for consistency. For me, this means that I don’t necessarily post about everything I’m going/everywhere I’m going, because if what I’m looking at isn’t clean, light and de-cluttered, I know it’s not going to look right on my feed.
Take this shot from Manhattan as an example. It ALMOST doesn’t match my feed, because of the yellow cabs. But I walked until I found an angle that I liked, and because the clean white Postal Office building + sky take up the majority of the image, it sort of neutralizes/minimizes the effect of the saturated yellow cabs.

Why does your feed matter? Because IG is sort of like a tiny version of your portfolio- if you have a gallery that consists of 19 bridal portraits and one family photo, that family photo is going to stick out, and not in a good way. It’s the same thing with IG- if I were to post a super contrasty, tons of color image, it’s going to draw your eye as you scroll down my feed, distracting you from the overall effect that I’m after. So if I DO post an image that doesn’t really fit with my feed, I’ll actually delete it after a couple of days to preserve the overall feel. It might sound crazy, but that’s what works for me!
You can find me on Insta under @abbygracephoto, or just click here!
BTdubs- we’ve just started up a newsletter sign-up, so if you found this helpful and want to read more occasional tips + tricks for photographers, be sure to enter your email address at the left sidebar! Or that cute little pop-up window. Your choice!
Photog Friday | 7 steps for taking better instagrams
June 26, 2015
Follow along
@abbygracephoto
info@abbygracephotography.com
WASHINGTON, DC & WORLDWIDE
DESIGN BY TONIC SITE SHOP
© ABBY GRACE PHOTOGRAPHY 2024
Back to top
You turned me on to Instagram, and I love it. That’s where I do most of my browsing now. I can almost always pick out your beautiful photos, and now I know why. Love you.
This could not have come at a better time! I’ve been looking for some resources to step up my IG feed and photography this week, so thank you for this, Abby! 🙂
You’re the best! Thank you sharing!