
Throughout the past few years, one of the most valuable lessons I’ve learned is how to get my images as close to perfect as possible in-camera. It used to take me weeks to edit a wedding, which was due in part to my poor understanding of editing, but also to how much work each image needed. I remember the first time I edited an engagement session in one day and I was SO proud of myself (as I should have been, it was a major accomplishment at the time!), and yet these days I can finish an engagement session in roughly 45 minutes, less than that if I turn off the wifi :). A large part of that is owed to how much I’ve done while shooting to get my ideal image, so that there’s less to do when I bring my images into LightRoom for editing.
I shoot with my mk3 on Manual mode, adjusting pretty much everything myself- exposure, ISO, aperture. The only things I leave up to my camera to figure out are Auto Focus and, in the past, white balance (WB from here on out). I figured I had enough to adjust between exposure and such that I could just let my camera do the work for WB, as it was usually “close enough” that it didn’t require too much work later on.
But sometimes, auto WB was just plain OFF. Either an image was way too cool (blue) or way too warm (yellow), and even though I was shooting in RAW, it just didn’t look as good after I finished editing when I was having to do substantial overhauls to get my photos close to “natural.” If an image was super blue and I had to drag the temperature slider up by more than 400-500 degrees, it left skin tones looking almost gray. Not pretty.
Then I discovered Kelvins! Well, I mean, I knew it was possible to shoot in Kelvins, but I never bothered with it because as I said, I was “managing” on Auto WB. But now that I know how much time it saves in post-processing if I take five seconds to adjust my white balance manually, I’ll never go back to shooting anything outdoors on Auto WB. Yes, Auto WB can work if it needs to, but one of my main goals is to spend LESS time behind the computer editing, and more time doing what I love: being behind the camera. Auto WB is usually ok for indoor stuff, like family formals and dancing shots, but for outdoor portraits, Kelvins is my jams.
See what I mean? Both of these images are unedited, with the exception of a little straightening (because for some reason, I always tend to shoot a little crookedly). The one on the left was shot on Auto WB, the one on the right was shot using Kelvins.
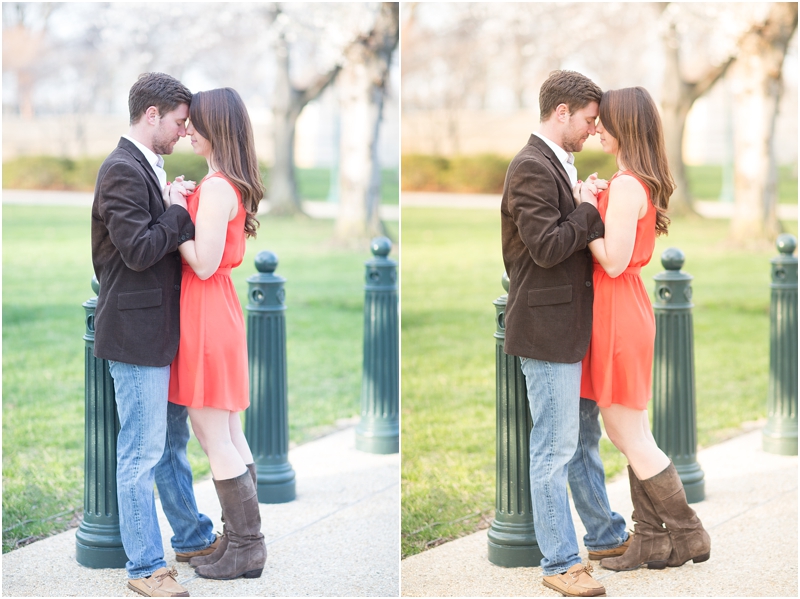
Neither is perfect, but the one on the right is a heck of a lot closer to my final product. The one I shot on Kelvins ended up being a little too warm, so I pulled back the temperature by a few degrees, adjusted my exposure and blacks, and voila. Done-zo!
There are a couple of ways to adjust a Canon 5dmk3’s Kelvin temperature settings. The way I originally learned to do it was by pressing the video button (the one at the top right corner of your LCD display), and then WHILE you’re in video mode, press your “WB” button, select “K” for Kelvins, and then adjust the degrees according to how warm or cool you want your settings to be. The Live View mode allows you to see how the changing settings will affect your image will turn out without having to take a test shot, so it’s quick and easy! The other method is by finding “White Balance” under your “Shoot” menu.
Happy Wednesday!
Lessons Learned: adjusting White Balance in-camera to save time on editing
April 9, 2014
Follow along
@abbygracephoto
info@abbygracephotography.com
WASHINGTON, DC & WORLDWIDE
DESIGN BY TONIC SITE SHOP
© ABBY GRACE PHOTOGRAPHY 2024
Back to top

Girl!!!! I used to cringe when I uploaded my images into lightroom and see those awful blue tones. Kelvin has been a lifesaver for me. I refuse to shoot in auto anymore!
super super helpful abby! can’t wait to try this!
I’m so glad you posted this…..just what I needed! You’re the best!
Ahhhh! THANK YOU so much for this much easier “simplified” method of using Kelvin! Super stoked to try it out now! 😀
Great tip Abby! Have have some playing to do!